Get Started
Want to quickly experience SUNBAY payments? This guide provides simple examples to help you complete your first integration in 5 minutes.
Prerequisites:
- Test Credentials: Obtained App ID and Merchant ID (see Development Setup)
- API Key: Generated a valid API Key in the admin portal
- Terminal Status: Terminal has Tapro app installed and bound to merchant, connected to the internet
Configuration
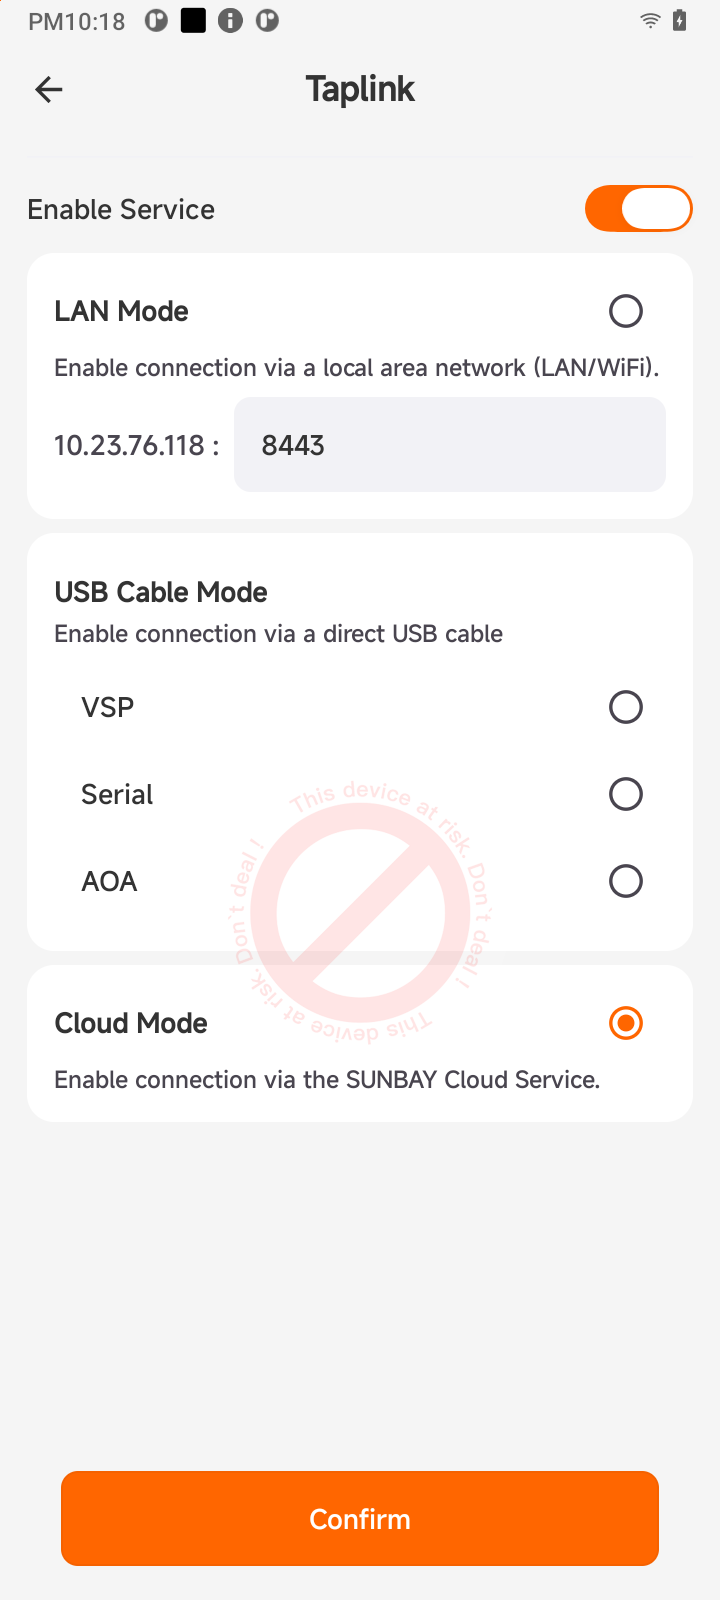
Configure Taplink Configuration Switch:
Open the Taplink Configuration switch in the Tapro app and set the connection mode to CLOUD:
How It Works
Run Test
Use API Tester to quickly experience cloud payments without writing any code.
Step 1: Open API Documentation
Visit the Sale API Documentation to view interface specifications and parameter requirements.
Step 2: Use Try it Feature
- Click the Try it button in the documentation to open API Tester
- Fill in your API Key in Headers:
Authorization: Bearer YOUR_API_KEY - Fill in payment request parameters in Request Body (variables can be auto-generated):
{ "appId": "your_app_id", "merchantId": "your_merchant_id", "referenceOrderId": "ORDER_123456", "transactionRequestId": "{{$transactionRequestId}}", "amount": { "orderAmount": 10000, "priceCurrency": "USD" }, "description": "Test Payment", "terminalSn": "your_terminal_sn" } - Click Send Request to send the request
- View Actual Request and Actual Response to understand the actual data sent and returned
Next Steps
Congratulations on completing your first payment experience! Next, you can:
Start Official Integration
Choose the appropriate integration method based on your business scenario:
- 📖 Development Process - Learn the complete development workflow and best practices
- 🔌 Local Integration - POS system and terminal at the same location, communicate directly via SDK
- ☁️ Cloud Integration - Server controls payment flow, suitable for SaaS platforms and chain stores
- 📦 SDK Documentation - View SDK guides for various languages
- 🔍 API Reference - View complete API documentation
Last updated on